


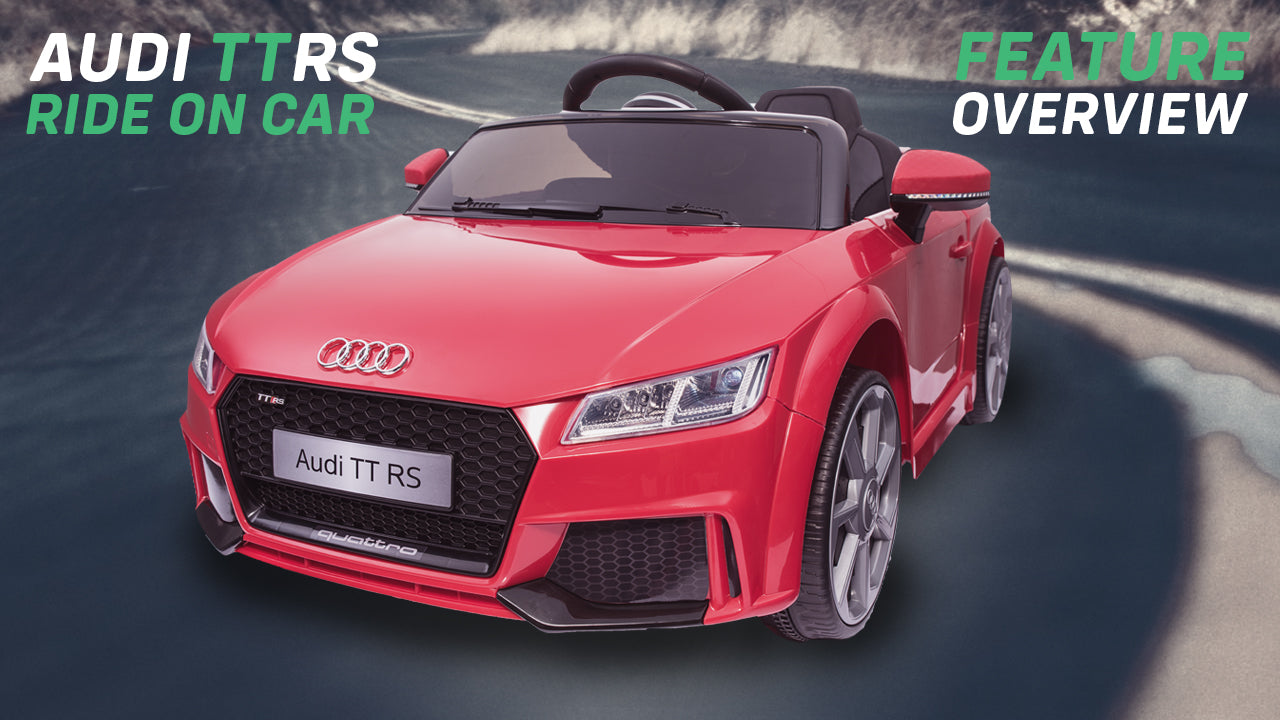
Audi TTRS 12V Ride On Car
Take a look at our latest ride on car video on the popular Audi TT RS. We go over all of the great features this car has including the parental remote control.
Your kid will really enjoy zipping around the neighborhood as everyone has to do a double-take. This is because the attention to detail these cars offer is second to none.
As the video says, the car is suitable for kids aged between 3 and 5 years old. However, we would state that this will vary from child to child.
Licensed Audi
Taking a look around the outside you will notice the authentic Audi badge that is just like the real thing.
The reason why we able to the Audi badge and styling is that this is the fully licensed version. In fact, we have been given their blessing to use the style and branding for this car.
Other Features
The video shows one of the cool features of the car, operating front and rear lights as well as cool dashboard lights too.
Every one of our TT's comes with a translucent see-through windscreen and a set of realistic style alloys with realistic calipers. This is the icing on the cake really.
Even though this a child's toy, it still has realistic looking tyre tread. This means your child can really picture themselves driving the real thing.
If you look around the back of the car you can't fail to notice the double exhaust and rear spoiler.
Parental Remote Control & Safety Seat Belts
Don't forget, it also comes with a parental remote control meaning you take over at any point.
In fact, most of our ride on cars come with a parental remote control allowing you to take over at any time. It gives some parents a sneaky opportunity to have a play around with car themselves :)
At RiiRoo we take your kid's safety seriously. That's why every car we sell is fitted with a safety belt and clip. So rest assured, your kid will be totally safe.

With both forward and reverse gears, foot accelerator and auto brake on release function, the features are endless.
Lastly, let's talk about the media player. Not only does the TT come with pre-installed songs.
You also have the ability to play your child's favourite tunes via the USB input. Simply plug in your own USB stick and play the tunes through the cars media centre and speakers.
Ride-On Car Battery Maintenance
One of the most common issues our customers face at RiiRoo is “The Car Won't Turn On” In most cases, the issue is very simple to resolve as we will demonstrate in this video.
Due to laws in the UK, unfortunately, we are not permitted to ship our ride-on toys with the battery terminals connected therefore, when you receive your car you must connect the battery yourself. In the video above we are going to show you the most common reasons why your Audi TT may not working.
Audi TT RS 12V Ride On Car Assembly And Pairing Remote Control
A short-ish video showing the complete assembly of our Kids 12V Audi TTRS Ride on Car.
• Make sure that the power switch is turned “OFF” before assembling the ride on.
• Before first time use, charge the battery for at least 4 to 6 hours.
• Assembly tools required: Screwdriver, Spanner, Longnose pliers.
Audi TT Ride On Car Parts Illustration

Front Wheel Assembly

Back Wheel Assembly

Wing Mirror & Headrest Assembly

Front Windscreen Assembly

Car Steering Wheel Assembly

Seat Assembly

Assembly Instructions
Remove all the parts from the rear axle. Slide the gearbox onto the rear axle, keep the motor and the connector on the gearbox through the larger hole on the rear of the vehicle and out where the battery sits.
Slide the driving wheel onto the rear axle and then match this with the gear box.
Slide the washer onto the rear axle. Hold the other side of the axle for leverage, tighten a lock nut to the end of the rear axle with a spanner.
Repeat on the other side. Now for the front wheels. Remove all parts from the axle. Slide the washer on the axle and then slide the bush onto the axle.
Slide on the wheel and ensure the bush is matched up with the notch on the wheel.
Follow this by sliding the washer onto the axle, then secure the wheel with the locking nut. Repeat on the other side. Then all you need to do is fit the hub caps onto the wheel.
Remove the steering column from the bottom of the car by cutting the cable ties securing it. Turn the vehicle body on its side.
Slide the steering gear box onto the steering column bar. Align the holes in the steering column with the holes in the steering gear box cork.
Tighten the M5X22 machine screw and number 5 nut. Insert the straight end of the steering column up through the hole in the remote control driver. Line up the holes in the r/c driver and the hole in the steering column.
Then fit a number 10 washer to the bent end of the steering column. Insert the split pin into the hole in the steering column, bend the ends of the split pin back to secure. You can use your hands to do this, however, we do recommend that you use the long nose pliers to avoid injury.
Turn the vehicle back onto its wheels, remove the M535 machine screw and 05 nut from the steering wheel. Place the steering wheel over the steering column protruding from the middle of the steering wheelbase.
Align the holes on each end of the steering wheel with the holes at the end of the steering wheel column, forcing the nut on the opposite end of the screw to secure the steering wheel to the steering column. Fit the tabs on the windscreen into the slots on the front, push until you hear it click into place.
Unbuckle seatbelt and move it out of the way to gain a better view of the under-seat compartment. Plug the vehicle connectors into the motor connectors, line up the tabs, push until you hear it click into place.
Repeat this for both motors. Then plug the red fuse connector into the terminal on the battery. Move seatbelt out of the way.
Fit the motor hood on the motor. Tighten four 0412 flathead screws to secure it. Repeat this for both motors. Fit the tabs on the back of the seat into the slots of the rear of the vehicle.
Tighten two M5X60 machine screws with the screwdriver. Fit the seat rest to the rear of the vehicle, push until you hear a click into place.
Line up the tabs, fit the rear spoiler to the rear of the vehicle. Fit the tabs on the mirror into the hole on the vehicle's side, push until you hear a click into place. Repeat on the other side.
To charge the car, find an empty wall socket and ensure that it is switched off.
Plug the charger into the socket, find the charging point in the car and plug the other side of the charger into the charging point. Switch on the wall socket to commence charging. It is recommended that the car's first charge should be between eight and 10 hours.
This is to maintain the efficiency of the battery, so don't be tempted to use the car until this step is undertaken.
Connecting the remote controller. For this step, you will need two AAA batteries, which are not included.
Undo the battery cover on the back of the controller using a Phillips head screwdriver and remove the cover form the controller itself. Then insert two AAA batteries, ensuring the batteries are the correct way around.
Replace the cover and tighten the retaining screw.
The first thing you need to do is find the connection button, which should be found at the top of the remote controller, press the connection button for two to four seconds first, then turn on the power button located on the vehicle dashboard console.
The low-speed indicator should flash into a long bright light. This means the connection is successful. If the indicator only flashes, this means there's a connection failure.
Replace the batteries and repeat the steps. And that's it, that's the end of the instruction for the Audi TT.
Check Out Our Other Ride On Cars and also our Audi Ride On Cars.
Our Audi TTRS also comes in different colours, like, black, yellow, red and white.
See our latest reviews to see what other customers have said - Click Here.


Share:
6V vs 12V Ride On Toys - What’s The Difference?
Mercedes Benz SL400 Ride On Car Kids Overview Video