


Published: 17.2.23
Updated: 14.3.25
Are you frustrated because your ride-on car charger is not charging or not working properly?
We know how important these chargers are to keep your kids' ride-on cars up and running. 
But when they fail, it can cause unnecessary stress and inconvenience. If you're looking for solutions to troubleshoot common problems with ride-on car chargers, you've come to the right place.
Disclaimer and Safety Guidelines
Safety Basics—Click to Expand
Working with electricity can be dangerous. If unsure about your charger’s safety or these troubleshooting steps, avoid using it. Consider a replacement to protect your child and ride-on car—always check the manual or contact the retailer when in doubt.
General Safety Tips
- Never use a charger with visible damage to the cord, plug, or casing.
- Do not handle with wet hands or on a wet surface.
- Always unplug before inspecting or cleaning.
- Keep the charging area well-ventilated, away from flammable materials.
- Teach children not to play with or touch the charger.
- Use only the manufacturer’s charger or an approved replacement.
Storage Tips
- Store in a dry, cool place when not in use.
- Keep away from heat sources and direct sunlight.
- Store out of reach of children and pets.
- Avoid areas prone to moisture or extreme temperatures.
- Use a hook or container to prevent cord tangling or damage.
Usage Tips
- Ensure the charger matches your ride-on car model.
- Don’t overcharge—unplug when the LED shows full.
- Inspect charger and cables regularly for wear or fraying.
- Clean the charging port and connector to avoid dust buildup.
- Avoid charging in extreme temps (below 32°F or above 104°F).
- Never modify or repair the charger yourself—seek a pro.
Charging Process
- Connect to the car first, then plug into the outlet.
- Ensure a secure connection at the charging port.
- Monitor the start of charging for proper function.
- Don’t leave unattended for long periods.
- Unplug from the outlet first, then disconnect from the car.
Following these tips ensures safe operation and protects your child and ride-on car. When in doubt, prioritize safety—consult the manufacturer or a professional.
Related: Here's How You Know If Your Ride-On Car Is Charging
Understanding Ride-On Car Chargers
Ride-on car chargers are a critical component in keeping your child's ride-on car up and running.
They are equipped with an LED light that indicates the charging status of the ride-on car.
Most ride-on car chargers come with a power cord that is plugged into a standard electrical outlet.
The power cord is then connected to the ride-on car's battery, which can take anywhere from 6 to 12 hours to fully charge.
LED Light Indicators and Their Meanings
The LED light on a ride-on car charger is a crucial indicator that tells you the charging status of your ride-on car battery.
While most chargers have a simple red/green indicator, some models may have more advanced indicators. Here's a comprehensive guide to common LED light behaviors:
| LED Light Behavior | Meaning | Action Required |
|---|---|---|
| Solid Red | Charging in progress | Continue charging |
| Solid Green | Fully charged | Unplug the charger |
| Blinking Red | Charging error or faulty connection | Check connections or contact manufacturer |
| Blinking Green | Maintenance mode or trickle charging | Safe to unplug or leave connected |
| No Light | No power or faulty charger | Check power source or replace charger |
Charging time recommendations
Solid Red: When the LED light is solid red, it means the ride-on car is actively charging. This is normal behavior, and you should allow the charging process to continue until completion.
Solid Green: A solid green light indicates that the ride-on car is fully charged and ready to use. At this point, you should unplug the charger to prevent overcharging.
Blinking Red: If you see a blinking red light, there may be a charging error or a faulty connection. Check all connections between the charger, battery, and power outlet. If the issue persists, contact the manufacturer for assistance.
Blinking Green: Some advanced chargers may enter a maintenance mode or trickle charging state after the battery is fully charged. This is designed to maintain the battery's charge without overcharging. It's safe to either unplug the charger or leave it connected in this state.
No Light: If there's no light at all, check if the charger is properly plugged into a functioning power outlet. If it is, the charger itself may be faulty and might need replacement.
Charging Time Recommendations
The instruction booklet that comes with your ride-on car charger will suggest the amount of time needed to fully charge the ride-on car battery.
It's important to follow these instructions to avoid overcharging the battery, which can cause permanent damage.
Once the LED light turns green (or indicates full charge), there is no need to continue charging the ride-on car battery.
Overcharging can reduce the lifespan of the battery and may even cause it to malfunction. It's also important to note that ride-on car chargers should only be used with their corresponding ride-on cars.
Using a charger that is not compatible with your ride-on car can cause damage to the battery or even create a safety hazard.
Always ensure you're using the correct charger for your specific ride-on car model.
By understanding these LED indicators and following the recommended charging practices, you can help maintain your ride-on car's battery health and ensure safe operation for your child's enjoyment.
Common Problems and Solutions
Water damage - Explanation of the problem
Water damage is a common problem that can occur with ride-on car chargers. Whether it's due to spilling liquid on the charger or leaving it outside in the rain, water can seep into the charger and cause damage to its internal components.
Once water gets inside the charger, it can cause a short circuit or corrosion, which can render the charger useless. This can be frustrating, especially if the charger was expensive or if a replacement is hard to find.
Solution:
Unfortunately, if your ride-on car charger gets wet, there's not much you can do to fix it. Once water gets inside the charger, it can cause irreversible damage.
Attempting to use the charger after it has been exposed to water can be dangerous and may result in electric shock or fire.
In this case, the only solution is to replace the charger with a new one. It's essential to note that even if the charger appears to be working after getting wet, it may fail in the future due to corrosion or other internal damage.
As such, it's best to err on the side of caution and replace the charger as soon as possible to ensure your child's safety.
Improper storage - Explanation of the problem
Improper storage is another common problem that can occur with ride-on car chargers. If you leave your charger in a damp or humid environment, it can cause internal damage that affects the charging capability of the charger.
When the charger is stored in a place where it is exposed to moisture, it can lead to corrosion of the internal components, which can lead to a reduced lifespan of the charger. Leaving the charger on the floor, where it is more susceptible to damage from accidental bumps or spills, can also cause it to malfunction.
Solution:
To avoid these problems, it's important to store your ride-on car charger properly. The best place to store your charger is in a cool, dry room, away from any sources of moisture or humidity.
If you must store your charger in a garage or other damp environment, make sure to place it on a shelf or table so that it is off the floor.
Alternatively, you can place the charger inside the toy footwell or another safe place in the ride-on car when it is not in use. It's also important to note that garden sheds are not ideal places to store your ride-on car charger, as they can be very damp and humid.
By storing your charger properly, you can extend its lifespan and ensure that it is always ready when you need it.
Voltage mismatch - Explanation of the problem
Voltage mismatch is a problem that can occur when using a replacement charger with your ride-on car.
Most ride-on car batteries require a specific voltage to charge correctly. However, when a replacement charger is purchased, the voltage may not match the original charger, resulting in an improper charge.
The consequences of voltage mismatch can range from a slower charge time to battery damage, which can affect the longevity of your ride-on car's battery.
Solution:
There are several reasons why voltage mismatches can occur, such as purchasing the wrong replacement charger or not purchasing it from the original retailer.
When replacing your ride-on car charger, it's crucial to find the right charger with the correct voltage specifications.
The original retailer is always the best source for replacement chargers, as they know the exact specifications needed for your ride-on car. If the original charger is no longer available, make sure to find a replacement charger with a slightly higher voltage than the battery voltage.
This is because the voltage needs to be higher to charge the battery faster.
It's also essential to note that different ride-on car models may have different voltage requirements, so always double-check the specifications before purchasing a replacement charger.
By ensuring that you have the right charger with the correct voltage specifications, you can avoid voltage mismatch problems and keep your ride-on car battery in top condition.
Tool That Could Be Used to Test (only if you have one)
A hydrometer is a useful tool that can be used to test the state of charge of your ride-on car battery. This tool measures the density of the electrolyte by determining its specific gravity.
The greater the concentration of sulfuric acid in the electrolyte, the denser it becomes, which can be measured with a hydrometer.
A fully charged ride-on car battery will typically have a specific gravity reading of around 1.265, while a discharged battery will have a reading of 1.120 or less.
Here's a step-by-step guide on how to use a hydrometer to test your ride-on car battery:
Step 1: Safety Precautions
- Put on protective eyewear and thick rubber gloves.
- Ensure you're working in a well-ventilated area.
- Wear closed-toe shoes and consider using a rubber apron for additional protection.
Step 2: Preparing the Hydrometer
- Clean the hydrometer thoroughly to ensure accurate readings.
- Check the hydrometer's calibration if possible. You can do this by measuring a known sample or using distilled water (which should read 1.000).
Step 3: Testing the Battery
- Move the ride-on car to a well-ventilated area and turn it off.
- Carefully remove the cell caps from the battery.
- Insert the hydrometer into one cell and squeeze the bulb to draw electrolyte into the device.
- Ensure you draw enough electrolyte to allow the float to move freely without touching the top or bottom of the cylinder.
Step 4: Reading the Hydrometer
- Hold the hydrometer vertically at eye level.
- Note the reading where the electrolyte meets the scale on the float.
- If the temperature isn't 80°F (27°C), adjust the reading by adding or subtracting 0.004 for every 10°F (6°C) above or below 80°F.
Step 5: Interpreting Results
-
Compare your adjusted reading to these standard values:
- Fully charged: 1.265-1.275
- 75% charged: 1.225-1.235
- 50% charged: 1.190-1.200
- 25% charged: 1.155-1.165
- Discharged: 1.110-1.130
-
Test each cell and note the readings. A variation of more than 0.050 between cells indicates a problem with the low-reading cell(s).
Based on your results, determine if the battery needs charging or if there are potential issues with specific cells.
If you're unsure about interpreting the results or notice significant discrepancies between cells, consider consulting a professional or the ride-on car manufacturer for further guidance.
Remember, not all ride-on car batteries use accessible liquid electrolyte, and some may not be compatible with a hydrometer.
Always consult your product manual or contact the manufacturer to ensure this method is appropriate for your specific ride-on car battery.
Common Charger Brands and Their Features
When it comes to ride-on car chargers, several reputable brands offer reliable and feature-rich options. Let's explore some of the most popular charger brands and their unique features:
RiiRoo
RiiRoo offers universal chargers compatible with a wide range of ride-on cars, motorbikes, and ATVs. Key features include:
- Universal 12V compatibility
- LED indicator for charging status
- Compact and portable design
- Safety certifications for peace of mind
Kid Trax
Kid Trax provides replacement chargers specifically designed for their ride-on toys.
Notable features include:
- Compatibility with most Kid Trax 6V toy ride-ons
- AC outlet connection
- Direct battery connection for efficient charging
Peg Perego
Peg Perego chargers are known for their reliability and smart charging technology. Standout features include:
- LED indicator that turns green when fully charged
- Switching technology for quick charging
- Ability to reactivate long-inactive batteries
- Compatibility with multiple voltage options (e.g., 12V, 24V)
- European and British Standard plug adaptors included
Power Wheels
While not explicitly mentioned in the search results, Power Wheels is a well-known brand in the ride-on toy market.
Their chargers typically offer:
- Brand-specific compatibility
- Reliable and consistent charging performance
- Safety features to prevent overcharging
Schumacher Electric
Schumacher Electric offers universal chargers for ride-on toys with versatile features:
- Multi-voltage compatibility (12V, 16V, 24V)
- Quick-disconnect cable for convenience
- UL safety certification
- Compact and lightweight design
When choosing a charger for your child's ride-on car, consider factors such as voltage compatibility, charging speed, safety features, and brand reputation.
Many of these chargers come with LED indicators to show charging status, which is particularly useful for monitoring the charging process.
It's important to note that while universal chargers offer flexibility, using a charger specifically designed for your ride-on car model is often the safest and most efficient option.
Always consult your ride-on car's manual or contact the manufacturer to ensure you're using a compatible and safe charger for your specific model.
Ensuring Battery Compatibility
When it comes to maintaining your child's ride-on car, using a compatible battery is crucial for both optimal performance and safety.
Let's explore why battery compatibility matters and how to ensure you're using the right battery for your ride-on car.
Importance of Compatible Batteries
Using the correct battery for your ride-on car is essential for several reasons:
- Safety: Compatible batteries are designed to work safely with your specific ride-on car model, reducing the risk of electrical issues or accidents.
- Performance: The right battery ensures your ride-on car operates at its intended speed and power level.
- Longevity: Compatible batteries are less likely to cause damage to your ride-on car's electrical system, potentially extending the life of both the battery and the vehicle.
Checking Specifications
To ensure you're using a compatible battery, follow these steps:
-
Consult the manual: Your ride-on car's instruction manual should list the required battery specifications, including voltage and capacity.
-
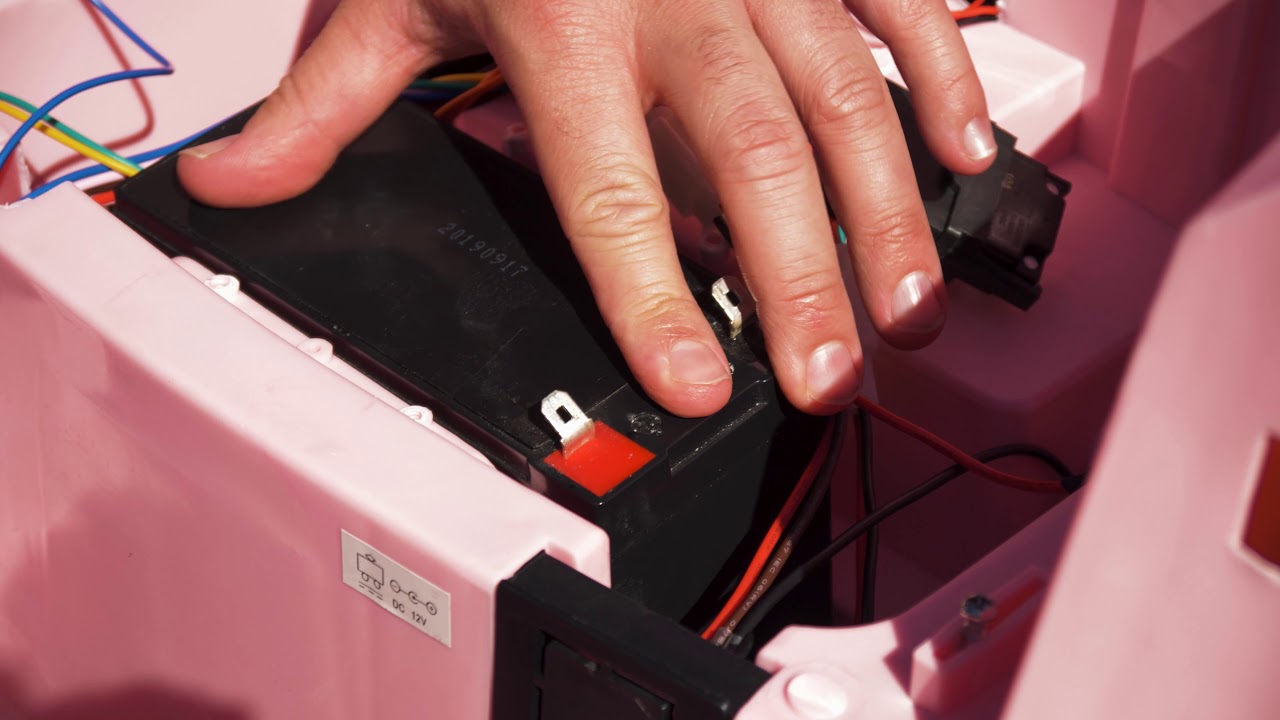
Check the existing battery: If you're replacing a battery, note its voltage (e.g., 6V, 12V, or 24V) and capacity (measured in Ah or mAh).
-
Examine the charger: Ensure your charger's output voltage matches the battery's required voltage.
-
Verify physical dimensions: Make sure any replacement battery fits properly in the battery compartment.
Potential Issues with Incompatible Batteries
Using an incompatible battery can lead to several problems:
- Reduced performance: An underpowered battery may result in slower speeds or shorter run times.
- Electrical system damage: Overpowered batteries can potentially damage the ride-on car's motor or wiring.
- Overheating: Incompatible batteries may overheat during use or charging, posing a safety risk.
- Shortened lifespan: Using the wrong battery can lead to premature failure of both the battery and the ride-on car's components.
Finding Compatible Batteries
When it's time to replace your ride-on car's battery, consider these tips:
-
Contact the manufacturer: Reach out to the ride-on car's manufacturer for recommendations on compatible replacement batteries.
-
Use reputable retailers: Purchase batteries from well-known retailers specialising in ride-on car parts and accessories.
-
Check for OEM options: Look for Original Equipment Manufacturer (OEM) batteries designed specifically for your ride-on car model.
-
Read reviews: Before purchasing a replacement battery, read customer reviews to ensure others have had success with that particular battery in your ride-on car model.
-
Verify warranty coverage: Ensure any replacement battery you choose doesn't void your ride-on car's warranty.
By prioritising battery compatibility, you can help ensure your child's ride-on car remains safe, performs well, and lasts for years to come.
Always err on the side of caution when selecting a replacement battery, and don't hesitate to seek professional advice if you're unsure about compatibility.
Troubleshooting Loose Connections
Signs of Loose Connections
- Intermittent charging
- Flickering LED lights
- Wobbly charger plug
How to Fix It
- Inspect: Check port and plug for damage.
- Clean: Use compressed air on the port.
- Replace: Swap out damaged cables.
In Summary
Proper charger maintenance is crucial for ensuring the longevity and safety of your child's ride-on car.
This guide has covered common problems with ride-on car chargers, including water damage, improper storage, voltage mismatch, and the tool that could be used to test the state of charge.
We have also provided solutions to these problems, including storing your charger in a cool, dry room, purchasing the right replacement charger from the original retailer, and using a hydrometer to test the state of charge of your ride-on car charger (if you have one).
It's essential to remember that working with electricity can be dangerous, and if you are ever unsure about any aspect of your ride-on car charger, contact a professional for help.
By following these tips and troubleshooting common problems with ride-on car chargers, you can ensure that your child is safe and that the battery on their ride-on car continues to operate properly.


Share:
Electric Quad Bike Maintenance: How To Keep Your Ride Running Smoothly
Get The Most Out Of Your Kids Ride on Car Battery