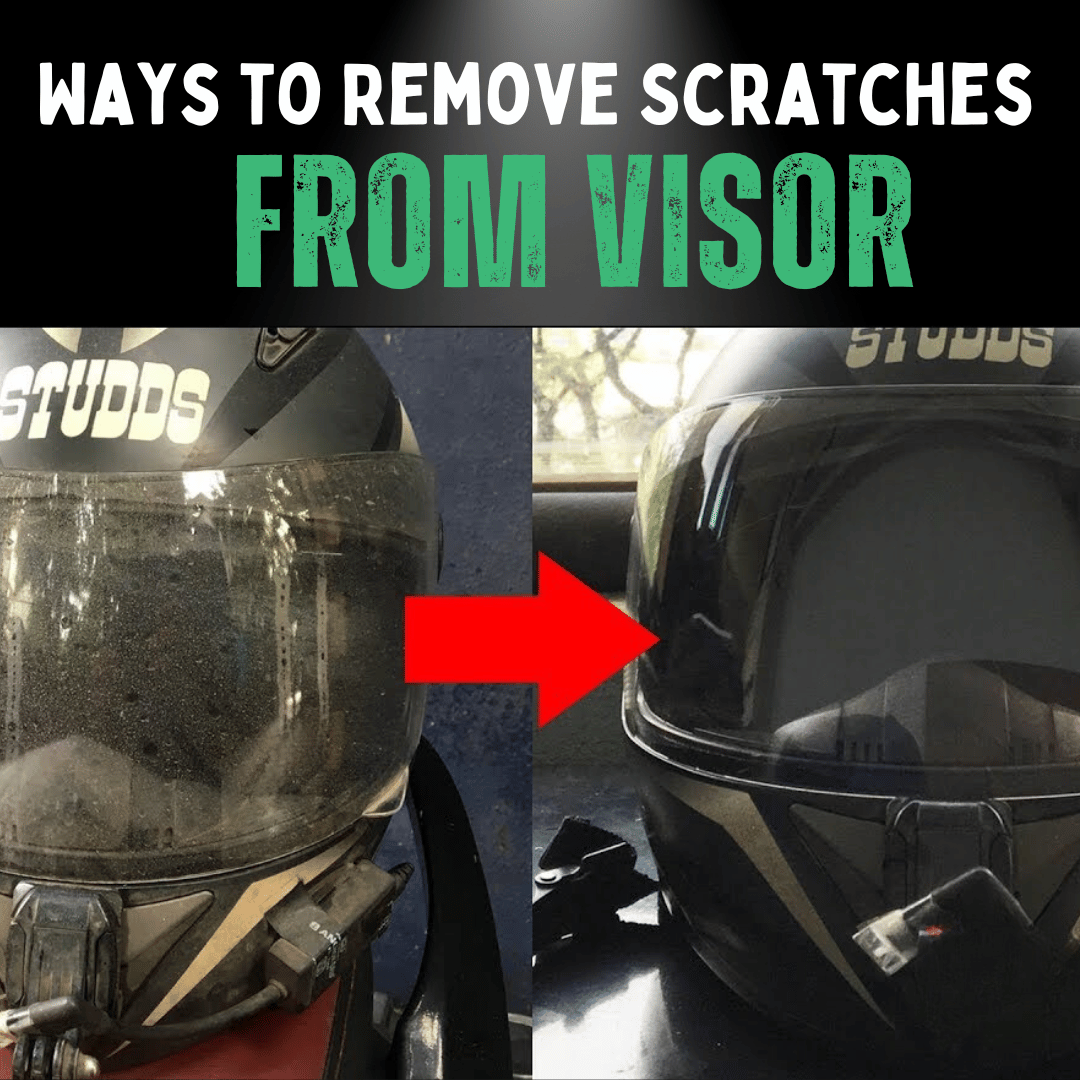
An image showing the before and after removing helmet visor scratches

Published: 24.8.23

Updated: 9.9.24

Ah, the open road. Nothing beats the freedom of the wind in your face as you roar down the highway, right?

Well, that wind could be a bit distracting if your visor is scratched up, blurring your view and putting a damper on your ride.

Worry not, fellow rider!

This article is your pit stop for treating that cloudy, scratched visor and turning it crystal clear again.

You'll be amazed by some of these unexpected tricks.

Let's dive in!

A Summary of the Ways to Remove Scratches from Your Helmet Visor

Helmet Visor Scratch Removal Guide
Step Method Instructions
1 Clean the SurfaceStart here for best results Wash the surface of the visor with water and dish detergent. Rinse and dry with a soft cloth.
Additional information about cleaning the surface.
2 Use Rubbing Alcohol Apply rubbing alcohol to the visor and rub in circular motions until scratches disappear. Rinse and dry with a soft cloth.
Additional information about using rubbing alcohol.
3 Use Toothpaste Apply a thin layer of toothpaste over the scratched area and rub it in using a soft cloth. Rinse and dry with a soft cloth.
Additional information about using toothpaste.
4 Use Sandpaper Wet a 2000-grit sandpaper and gently rub over the scratched area for 15 minutes or until scratches are gone. Rinse and dry with a soft cloth.
Additional information about using sandpaper.
5 Use a Power Buffer Polisher Use a power buffer polisher with warm soapy water to remove the scratches.
Additional information about using a power buffer polisher.

Why Having a Clear Visor is Important

So why the fuss over a couple of scratches? Simply put, it's all about safety and clarity.

You wouldn't drive your car with a dirty windshield, would you?

Scratches on your helmet's visor distort your vision, lead to glare, and can outright jeopardise your safety.

Plus, who doesn't like a crisp, unobstructed view when riding?

Makes the whole experience a lot better, right?

Related: Get The Right Motorcycle Helmet Fit

get-the-right-motorcycle-helmet-fit

Types of Scratches and Best Methods for Each

Alright, not all scratches are created equal.

Whether you’re dealing with motorcycle helmet visors or any other types, some are mere surface scuffs, others are deep scratches, and some are just annoying swirl marks.

  • Surface Scuffs: These are your typical minor nicks that are more like a smudge on your reputation. Fast and simple treatments like toothpaste or rubbing alcohol are your go-to options here.
  • Deep Scratches: These are the kinds that make your heart sink. You'll need a comprehensive deep scratch removal process, involving the use of sandpaper or a power polisher for these.
  • Swirl Marks: These are often the result of cleaning your visor with a rough cloth. A power buffer polisher can be a real lifesaver here.

Related: Why Do Dirt Bike Helmets Have Visors?

why-do-dirt-bike-helmets-have-visors

Required Tools and Materials

Before we roll up our sleeves, make sure you've got all the tools for the job.

You'll need:

  • Water.
  • Dish detergent.
  • Soft cloth or sponge.
  • Rubbing alcohol.
  • Toothpaste (the non-gel type).
  • Microfiber cloth.
  • Wet 2000-grit sandpaper.
  • Power buffer polisher.

Got everything?

Sweet, let's get to it.

Method 1: Clean the Surface

an image  ofa detailed close-up photograph capturing a motocross helmet placed on a wooden table in a modern indoor showroom

Introduction and Importance

First things first. You can't paint a masterpiece on a dirty canvas, and the same goes for treating your visor.

Step-by-Step Guide

  1. Fill a bowl with warm water and add a few drops of dish detergent.
  2. Use a soft cloth or sponge to gently wash the visor.
  3. Rinse thoroughly.
  4. Dry with a soft cloth.

Key Points

Remember, this is all about laying the groundwork for the following methods, so make sure the surface is squeaky clean.

Summary and Transition

Alright, you've prepped the stage. What's next? Let's dial it up a notch!

Related: How to Clean Your Dirt Bike Helmet (The Best Way)

how-to-clean-your-dirt-bike-helmet

Method 2: Use Rubbing Alcohol

Introduction and Importance

Rubbing alcohol is not just for wounds; it's a first-aid fix for your visor too!

Step-by-Step Guide

  1. Apply some rubbing alcohol to a soft cloth.
  2. Gently rub in circular motions over the scratched area.
  3. Rinse thoroughly.
  4. Dry with a soft cloth.

Key Points

Be careful not to rub too hard, or you could end up causing more damage.

Summary and Transition

Pretty straightforward, right? Let's get to something you probably never thought of—your toothpaste!

Method 3: Use Toothpaste

close-up image of a person's hand squeezing a tube of Colgate toothpaste onto the visor

Introduction and Importance

Believe it or not, toothpaste isn't just for bright smiles. It can give your visor a makeover too!

Step-by-Step Guide

  1. Apply a thin layer of non-gel toothpaste over the scratches.
  2. Rub it in gently with a soft cloth or microfiber towel.
  3. Rinse thoroughly.
  4. Dry with a soft cloth.

Key Points

Opt for plain white toothpaste; those with extra "grit" offer better results.

Summary and Transition

See, I told you this list would surprise you! Next up, we're getting a bit grittier.

Method 4: Use Sandpaper

A person holding a piece of sandpaper in front of the helmet's visor

Introduction and Importance

It sounds counterproductive, doesn't it?

But sometimes you need a bit of grit to get smooth results.

Step-by-Step Guide

  1. Wet a 2000-grit sandpaper sheet.
  2. Gently rub over the scratched area in circular motions.
  3. Continue for about 15 minutes or until the scratches fade.
  4. Rinse thoroughly.
  5. Dry with a soft cloth.

Key Points

This method requires patience and a gentle hand. Don't rush it!

Summary and Transition

Feeling brave yet? Our final method involves a power tool, so let's power up!

Method 5: Use a Power Buffer Polisher

man is wearing casual clothing, including a cap, sweatshirt, and shorts. He is using a power buffer tool on the helmet visor

Introduction and Importance

For those stubborn scratches that just won't budge, it's time to bring in the heavy artillery.

Step-by-Step Guide

  1. Fill a bucket with warm, soapy water.
  2. Dip the power buffer polisher into the water.
  3. Gently run the buffer over the scratched area until they disappear.
  4. Rinse thoroughly.
  5. Dry with a soft cloth.

Key Points

Keep the buffer moving to avoid creating new scratches.

Summary

You've just turned your scratched-up visor into a clear window to the world—or at least, the road ahead!

Related: Motorcycle Safety Tips - Visor vs Goggles

visor-vs-goggles

Precautions and Common Mistakes

Before we dive into the nitty-gritty of scratch removal, let's talk about what NOT to do.

After all, you don't want to turn a minor surface scuff into a major headache, right?

  • Don't Rush: The deep scratch removal process requires patience. More haste can result in less speed, especially when dealing with motorcycle helmets.
  • Test a Small Area First: Before fully committing to a method, test it on a less noticeable part of your helmet visor. This is crucial for both motorcycle visors and any tint you may have applied.
  • Avoid Using Hard or Abrasive Cloths: Always opt for soft cloths or polishing towels to avoid adding more scratches.

Effectiveness Over Time

You’ve followed the polishing process to a T, and your visor is looking brand new.

But how long can you expect this perfection to last?

  • Temporary Fixes: Methods like toothpaste and rubbing alcohol are great for home-based, fast solutions but provide a temporary polishing compound effect.
  • Semi-Permanent: Sandpapering offers a more durable fix but may require retouching after several months.
  • Long-Lasting: A power buffer polisher provides the most long-lasting results, especially if you finish up with a protective coating.

Product Recommendations

Although we won't be mentioning specific brands, it's important to know what type of products will give you the best results.

  • Microfiber Cloth: Look for one with a high GSM (grams per square meter) rating. A high-quality cloth can make the polishing process a breeze.
  • Rubbing Alcohol: For removing scratches and minor surface scuffs, opt for a solution with at least 70% alcohol content.
  • Power Buffer Polisher: If you decide to invest in one, make sure it has variable speed settings to cater to both surface scuffs and deep scratches.
  • Toothpaste: A simple, white, non-gel toothpaste is best for scratch removal.
  • Sandpaper: Go for a 2000-grit or higher for best results.

Remember, a well-executed scratch removal process is only as good as the products you use.

Related: 8 SIMPLE Steps to the Ultimate Motorcycle Visor Upgrade

steps-to-the-ultimate-motorcycle-visor-upgrade

Conclusion

There you have it—five surprisingly effective ways to get your helmet visor back in tip-top shape.

Remember, riding is not just about the thrill; it's also about staying safe and clear sight is a big part of that.

So which of these methods are you going to try first?

Whatever you choose, happy riding, and may your view be ever clear!

FAQs

What Are Some Common Causes of Scratches on Helmet Visors?

One prevalent cause of scratches on helmet visors is dirt and road debris getting trapped between the visor and the helmet. Additionally, for those with motorcycle helmets featuring face shields, scratches can occur accidentally while putting on or taking off the helmet.

Can These Methods Also Work on Motorcycle Helmet Visors?

Yes, the methods detailed in the article are applicable to both bicycle and motorcycle helmet visors. They are universal techniques designed to help you restore clarity to your visor, whether you are a cyclist or a motorcyclist.

How To Prevent Scratches on Helmet Visors?

To minimise the risk of scratches, it's essential to clean your visor regularly with soft materials. Using a protective film can add an extra layer of defence against scratches. Proper storage in a padded case can also prevent accidental damage. Lastly, avoid using harsh chemicals that could weaken the visor material, making it more susceptible to scratches.

Are There Any Products Specifically Designed for Removing Scratches from Visors?

Yes, there are specialised products for this purpose. For instance, CareMotul® MC CARE™ E8 Scratch Remover is designed to remove superficial scratches on painted or varnished surfaces, making it suitable for visor scratch removal. Another option is McGuires PlastX, a highly regarded plastic polish that can effectively buff out scratches on your visor.

Get in Touch 🚀

Hey there, savvy shopper! Loved our article on “5 SURPRISING Ways to Remove Scratches from Your Helmet Visor” Got the itch to dive into more wheely-awesome info?

Whether you're a parent or a grandparent, we're here for all your kids ride-on toy questions! 🚗💨

Feeling click-happy?

Jump straight into our wonderland at RiiRoo.com. Or, if you're more the chatty type, give our Live Chat a whirl and let's talk toys!

Latest Stories

View all

What Type of 24V Ride-On Should You Buy?

What Type of 24V Ride-On Should You Buy?

Are you considering a ride-on vehicle to give your child a taste of thrilling adventure and independence? With the array of ride-on cars available, it’s easy to feel overwhelmed. But when it comes to finding the perfect blend of power,...

Read more

What is the Difference Between a Kid's 50cc Quad and 110cc Quad?

What is the Difference Between a Kid's 50cc Quad and 110cc Quad?

When you are selecting a quad bike for a child, the choice often boils down to engine size, typically 50cc or 110cc. These two categories cater to different age groups, skill levels, and usage scenarios, making it essential to understand...

Read more

How Much Petrol Does a Kids Motorbike Use?

How Much Petrol Does a Kids Motorbike Use?

Understanding the fuel consumption of a kid's motorbike is essential for any parent or guardian. Not only does it help save on running costs, but it also ensures the motorbike operates at its peak efficiency, providing a better experience for...

Read more