Published: 15.8.23

Updated: 12.8.24

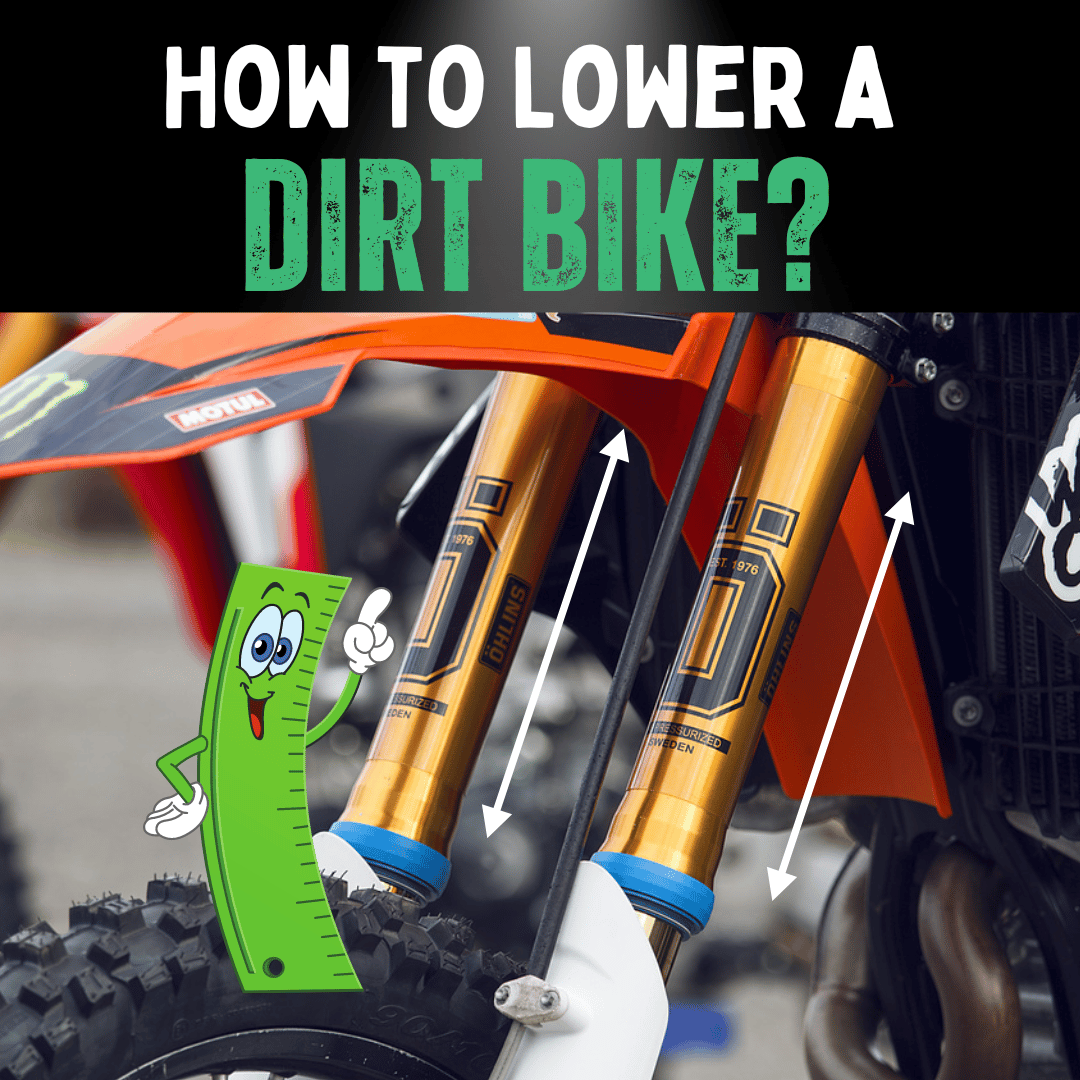
Riding a dirt bike can be one of life's greatest joys, a feeling of freedom unmatched by many. A dirt bike suspension with a fun comic ruler

But the right bike size is crucial to this experience. If you're wondering what size might suit you best, refer to our guide on what size dirt bike you need

But sometimes, the ride height of these bikes can be a tad challenging for some enthusiasts.

Particularly for beginners, understanding the specifics of a dirt bike is essential. If you're a parent with concerns, we've addressed some common questions about junior dirt bikes and quads.

Whether you’re vertically challenged or just seeking a different ride experience, lowering your dirt bike might just be the solution. So, how do you go about it?

Let’s dive in!

How to Lower a Dirt Bike?

Lowering a Dirt Bike's Front Suspension?

Begin by alleviating the fork's pressure for front suspension adjustment, typically achieved by lifting the bike via the engine area. Proceed to loosen the fork pinch bolts. Modify the bike's height by carefully sliding the forks up through the triple clamps. Once adjusted, ensure all components are reassembled correctly, securely tightening the pinch bolts.

Introduction

Have you ever sat on your dirt bike and thought, "I wish I could touch the ground a bit easier"?

You're not alone. Adjusting the height of a dirt bike can significantly change your riding experience, offering improved stability and reach.

With a blend of DIY methods and expert techniques, you can adapt your bike's stature to your preference. In this guide, we'll walk you through the specifics.

1. Adjusting the Rear Shock

Remember how adjusting the height of a chair can make all the difference in comfort?

Well, the rear shock on a dirt bike acts much the same way.

What is Rear Shock Adjustment?

Think of it as the spine of your bike. It’s the primary component that determines the bike's ride height.

Step-by-Step Process:

  1. Secure your bike on a stand to elevate the rear wheel.
  2. Locate the preload adjustment rings on the rear shock.
  3. Using a shock spanner wrench, turn the adjustment ring counter-clockwise to reduce preload and lower the bike.
  4. Recheck the sag and adjust as necessary.

Tip: Always make small adjustments and test rides to gauge the difference.

Related: Motocross Suspension Setup Guide

Motocross Suspension Setup Guide

Safety Precautions for Adjusting the Rear Shock

Safety should always be your top priority when working on your dirt bike's suspension.

When tweaking your dirt bike's rear suspension, particularly the rear shock, here are some golden rules to follow:

  • Secure Your Bike: Before making any adjustments, ensure your bike is stable and secure. Use a reliable bike stand to prevent unexpected movement or tipping. A falling bike can cause serious injury or damage to both you and the machine.

  • Wear Protective Gear: Always wear gloves to protect your hands from dirt, grease, and potential pinch points. Safety glasses are also recommended to shield your eyes from debris or sudden releases of pressurized components.

  • Release Pressure Safely: If your shock has a nitrogen-charged reservoir, release the pressure slowly and carefully. Rapid depressurization can cause injury or damage to the shock.

  • Double-check Your Adjustments: After modifying the rear suspension, thoroughly inspect your work. Ensure all bolts are properly tightened and components are correctly aligned. Loose or misaligned parts can lead to dangerous instability during riding.

  • Gradual Testing: Start with small adjustments and test incrementally. Drastic changes can dramatically alter your bike's handling, potentially leading to loss of control.

  • Test in a Safe Environment: Before tackling challenging terrains, test your adjustments in a controlled, safe area. This allows you to familiarize yourself with the new handling characteristics without the added risk of difficult obstacles.

  • Be Aware of Preload Limits: Avoid maxing out your shock's preload. Excessive preload can damage the shock and negatively impact your bike's handling.

  • Understand Your Bike's Limits: Remember that lowering your bike excessively can reduce ground clearance and suspension travel, potentially leading to bottoming out in rough terrain.

  • Consult Professionals: If you're unsure about any aspect of suspension adjustment, don't hesitate to consult a professional mechanic or experienced rider. Improper adjustments can lead to dangerous riding conditions.

By following these safety precautions, you'll minimize the risks associated with rear shock adjustments and ensure a safer, more enjoyable riding experience.

Remember, proper suspension setup not only improves performance but also enhances overall safety on the trail or track.

Related: What Suspension Do Dirt Bikes Use?

What Suspension Do Dirt Bikes Use?

2. Lowering the Front Forks

Imagine sliding down a slide. The steeper it is, the faster you go. The angle of your dirt bike's forks can similarly influence its performance.

How Do Front Forks Impact Ride Height?

These forks control the tilt and height of your bike's front end. The more they're adjusted, the lower your bike leans.

Step-by-Step Guide:

  1. Loosen the upper and lower triple clamp bolts.
  2. Carefully slide the forks upwards in the clamps.
  3. Tighten the bolts back to the recommended torque.

Heads up: As this affects handling, always take a test ride after.

Related: How to Install Dirt Bike Grips

how-to-install-dirt-bike-grips

Post-adjustment Tips for Lowering the Front Forks

With your front suspension tailored to your liking, there's a road of discovery ahead.

Ponder over these pointers after you alter the front forks:

  • Brake Sensitivity: With an altered height, brakes might have a different response. Test and if needed, tweak their sensitivity.
  • Alignment Check: Confirm your front wheel correlates well with the handlebars. A misaligned wheel can drastically veer off your riding experience.
  • Suspension Rebound: Tweaked front forks can sometimes revamp the suspension's rebound. Hop on for a quick test ride; you might need some additional adjustments.

3. Installing a Lowering Link

Ever swapped out shoe laces for a different look or fit? Similarly, a lowering link changes your bike's stance.

What is a Lowering Link?

It's essentially a new 'set of laces' for your bike, adjusting its posture.

Steps:

  1. Support your bike, ensuring the rear wheel is off the ground.
  2. Remove the stock linkage and replace it with the lowering link.
  3. Reassemble and adjust other components as necessary.

Maintenance Check After Installing a Lowering Link

After embedding a lowering link in your dirt bike setup, maintenance becomes paramount.

Here’s what to bear in mind:

  • Regular Inspections: Post every few rides, and dedicate some time to inspect this link or connection. Stay alert for signs of wear or any alterations needed.
  • Lubricate Regularly: A well-oiled linkage system always outperforms a neglected one.
  • Stay In The Loop: Manufacturers might roll out updates or even recalls. Keeping abreast ensures your motorcycle has the finest version of any part.

4. Shaving the Seat Foam

Taking a bit off the top can make all the difference, right? Just like a haircut, shaving your seat foam can modify your ride's feel.

Steps:

  1. Remove the seat from the bike.
  2. Carefully cut away the desired amount of foam.
  3. Reupholster or staple the seat cover back in place.

Note: While it's an effective method, comfort might take a backseat.

5. Using a Smaller Tyre

It's akin to swapping out stilettos for flats; effective, but with a different stride and grace.

How Tyre Size Impacts Ride Height:

A smaller circumference means a reduced overall height.

Warning: This could alter performance. An experienced touch is recommended.

Related: FLAT TYRE? Fix Your Dirt Bike Tube in Minutes

fix-your-dirt-bike-tube-in-minutes

Tyre Performance Impact When Using a Smaller Tyre

A change in tyre size isn't mere aesthetics; it intertwines deeply with performance.

Here's the skinny on how a smaller tyre might remix your riding experience:

  • Speedometer Reading: A nimbler tyre can sometimes make your speedometer overestimate. It might show you're blasting faster on the track than your actual speed.
  • Grip Dynamics: Compact tyres can shuffle the grip dynamics, especially on mushy or damp terrains.
  • Fuel Economy: Far-fetched but not fiction, tyre size can influence your bike's fuel efficiency. Monitor that fuel gauge!

Pros and Cons of Lowering a Dirt Bike

Before modifying your dirt bike's height, it's crucial to weigh the advantages and disadvantages.

Here's a comprehensive look at the pros and cons:

Pros:

  1. Improved Reach:

    • Shorter riders gain confidence with feet firmly on the ground.
    • Easier mounting and dismounting, especially in challenging terrain.
  2. Increased Comfort:

    • Optimized riding position reduces fatigue on longer rides.
    • Better control in tight situations, like navigating through dense woods.
  3. Enhanced Stability:

    • Lower center of gravity improves balance, particularly at low speeds.
    • Increased stability can lead to better cornering in certain conditions.
  4. Customized Fit:

    • Tailors the bike to your specific body type and riding style.
    • Can alleviate strain on knees and back for some riders.
  5. Potential Performance Gains:

    • In some racing scenarios, a lower bike can offer aerodynamic advantages.
    • Improved weight distribution can enhance traction in certain conditions.

Cons:

  1. Altered Handling:

    • Changes in geometry can affect the bike's intended handling characteristics.
    • May require a period of adjustment to adapt to new riding dynamics.
  2. Reduced Ground Clearance:

    • Increased risk of bottoming out on obstacles or in deep ruts.
    • Limited ability to tackle more challenging terrain or larger jumps.
  3. Increased Vulnerability:

    • Higher risk of damage to undercarriage components.
    • Potential for catching the frame or footpegs on obstacles.
  4. Impact on Suspension Performance:

    • Reduced suspension travel can compromise ride quality and absorption.
    • May limit the bike's ability to handle rough terrain effectively.
  5. Warranty Considerations:

    • Some modifications may void the manufacturer's warranty.
    • Could lead to denied claims for related issues.
  6. Insurance Implications:

    • Modifications might need to be declared to insurers.
    • Potential for increased premiums or coverage limitations.
  7. Resale Value Impact:

    • Modifications can decrease resale value for some buyers.
    • Limited market for heavily modified bikes.
  8. Maintenance Challenges:

    • Altered geometry may affect wear patterns on components.
    • Some standard parts or accessories may no longer fit properly.
  9. Safety Concerns:

    • Changes in handling could pose risks for inexperienced riders.
    • Reduced ground clearance may increase the likelihood of accidents in certain terrains.
  10. Reversibility Issues:

    • Some lowering methods may be difficult or impossible to reverse.
    • Returning to stock height could require significant investment.

By carefully considering these pros and cons, you can make an informed decision about whether lowering your dirt bike aligns with your riding goals and preferences.

Remember, the impact of lowering can vary based on the specific bike model, riding style, and the extent of the modification.

It's often beneficial to consult with experienced riders or professionals before making significant changes to your bike's setup.

Common Mistakes to Avoid When Lowering a Dirt Bike

When modifying your dirt bike's height, it's crucial to be aware of potential pitfalls.

Avoiding these common mistakes will help ensure a safe and effective lowering process:

Over-tightening Bolts

One of the most frequent errors is applying excessive force when tightening bolts. This can lead to stripped threads, damaged components, or even bolt failure during rides. Always use a torque wrench and adhere to the manufacturer's specified torque values.

Incorrect Suspension Settings

Lowering your bike without properly adjusting the suspension can result in poor handling and reduced performance.

Key mistakes include:

  • Neglecting to adjust the sag
  • Setting the compression and rebound damping incorrectly
  • Failing to balance front and rear suspension changes

Ensure you understand how each adjustment affects your bike's behavior and make incremental changes, testing after each modification.

Ignoring Manufacturer Guidelines

Each dirt bike model has specific limitations and recommendations for modifications.

Disregarding these guidelines can lead to:

  • Voided warranties
  • Compromised structural integrity
  • Unsafe riding conditions

Always consult your bike's manual or the manufacturer's website for approved modification ranges.

Excessive Lowering

While it may be tempting to lower your bike significantly, overdoing it can cause serious issues:

  • Reduced ground clearance, leading to more frequent bottoming out
  • Altered geometry, affecting handling and stability
  • Increased risk of frame or swingarm contact with the rear tyre

Aim for a balance between lowering the bike and maintaining its intended performance characteristics.

Neglecting Chain Tension

Lowering your bike often changes the distance between the front and rear sprockets.

Failing to adjust the chain tension accordingly can result in:

  • Premature chain and sprocket wear
  • Increased risk of chain derailment
  • Potential damage to the engine cases if the chain breaks

Always check and adjust your chain tension after modifying your bike's height.

Forgetting to Re-align the Headlight

Lowering your bike changes its stance, which can affect the headlight's aim.

Neglecting to readjust the headlight can lead to poor visibility during night rides, compromising safety.

By being aware of these common mistakes and taking steps to avoid them, you'll ensure a smoother, safer process when lowering your dirt bike.

Remember, if you're unsure about any aspect of the modification, it's always best to consult with a professional mechanic or experienced rider.

When to Consult a Professional for Dirt Bike Lowering

While many aspects of lowering a dirt bike can be done at home, there are situations where professional expertise is invaluable.

Knowing when to seek professional help can save you time, money, and potential safety risks.

Complex Adjustments

Some modifications require specialized knowledge or equipment:

  • Internal fork modifications
  • Custom shock tuning
  • Frame alterations

These adjustments often involve precision work that, if done incorrectly, can compromise your bike's performance and safety.

Specialised Equipment

Certain lowering methods require tools not commonly found in a home garage:

  • Suspension dyno testing
  • Precision machining for custom parts
  • Specialized alignment tools

Professionals have access to these tools and the expertise to use them effectively.

Warranty Considerations

If your bike is still under warranty, DIY modifications might void it. A certified mechanic can:

  • Perform manufacturer-approved modifications
  • Document the work properly to maintain warranty coverage
  • Advise on which modifications are warranty-friendly

Race Preparation

For competitive riders, professional tuning can provide a crucial edge:

  • Optimising suspension for specific tracks or race conditions
  • Fine-tuning the bike's geometry for maximum performance
  • Ensuring compliance with racing regulations

Persistent Issues

If you've attempted adjustments but are still experiencing problems, it's time to consult a pro:

  • Ongoing handling issues
  • Unexplained noises or vibrations
  • Inconsistent performance

A professional can diagnose and resolve issues that might not be apparent to the average rider.

Safety Concerns

When in doubt about any safety-related aspect of lowering your bike, seek professional help:

  • Structural integrity questions
  • Suspension behavior uncertainties
  • Stability concerns

Your safety is paramount, and a professional can ensure your modifications don't compromise it.

Choosing a Reputable Mechanic

When selecting a professional for your dirt bike modifications:

  1. Check credentials: Look for certifications from reputable organisations or manufacturers.

  2. Ask for references: Experienced mechanics should have a portfolio of satisfied customers.

  3. Inquire about specialization: Some mechanics specialize in certain brands or types of modifications.

  4. Discuss their approach: A good mechanic will explain their process and listen to your specific needs.

  5. Consider their experience: Look for someone with a proven track record in dirt bike modifications.

  6. Evaluate their facility: A well-equipped shop is often indicative of a professional operation.

Remember, a skilled professional can not only perform the modifications but also provide valuable advice on maintaining and optimising your lowered dirt bike.

While it may seem more costly upfront, professional consultation can save you from expensive mistakes and ensure your bike performs at its best.

Ultimately, the decision to consult a professional should be based on your skill level, the complexity of the desired modifications, and your comfort level with the risks involved.

When in doubt, it's always better to err on the side of caution and seek expert assistance.

Long-term Maintenance Tips After Lowering Your Dirt Bike

Regular Inspections

Conduct thorough inspections more frequently than you would with a stock bike:

  • Check all bolts and fasteners for tightness, especially those related to the suspension and lowering modifications.
  • Inspect the frame and swingarm for any signs of stress or cracks, particularly around modification points.
  • Examine the chain and sprockets for proper alignment and wear.

Aim to perform these checks before every ride, with a more comprehensive inspection monthly or after every 20 hours of riding time.

Suspension Maintenance

Your lowered suspension requires extra attention:

  • Clean and lubricate suspension linkages more frequently to prevent premature wear.
  • Check for oil leaks around the fork seals and shock absorber.
  • Monitor the sag settings and adjust as necessary, as they may change over time.

Consider servicing your suspension components every 50 hours of riding or annually, whichever comes first.

Tyre Care

Lowering your bike can affect tyre wear patterns:

  • Rotate your tyres more frequently to ensure even wear.
  • Check tyre pressure before each ride, as lowered bikes may be more sensitive to pressure changes.
  • Inspect for unusual wear patterns that could indicate alignment issues.

Lubrication Schedule

Maintain a strict lubrication schedule:

  • Grease all pivot points, including the swingarm and linkage bearings, every 20 hours of riding.
  • Lubricate the chain after every ride, especially if you've been riding in dusty or muddy conditions.
  • Apply a light coating of anti-seize compound to bolts during reassembly to prevent seizure.

Monitoring Performance

Pay close attention to how your bike performs over time:

  • Note any changes in handling, suspension feel, or overall ride quality.
  • Listen for unusual noises, especially from the suspension components.
  • Track your bike's performance in different terrains and adjust settings as needed.

Signs of Potential Issues

Be vigilant for these warning signs:

  • Excessive bottoming out of the suspension
  • Uneven tyre wear
  • Unusual noises from the suspension or drivetrain
  • Decreased stability or handling performance
  • Visible damage or deformation to any components

If you notice any of these issues, address them immediately to prevent more serious problems.

Professional Check-ups

Consider having a professional mechanic inspect your lowered bike:

  • Schedule a thorough check-up every 6 months or 100 hours of riding.
  • Have the suspension professionally serviced annually or as recommended by the manufacturer.

By following these long-term maintenance tips, you'll ensure that your lowered dirt bike continues to perform optimally and safely.

Remember, a well-maintained bike not only lasts longer but also provides a more enjoyable and safer riding experience.

Always prioritise safety and don't hesitate to seek professional help if you're unsure about any aspect of your bike's maintenance.


Troubleshooting Issues After Lowering Your Dirt Bike

After lowering your dirt bike, you might encounter some unexpected issues.

Here's how to identify and resolve common problems:

Handling Issues

If your bike feels unstable or difficult to control:

  1. Check suspension sag: Ensure the sag is set correctly for your weight and riding style. Adjust preload if necessary.

  2. Verify suspension balance: Make sure front and rear suspension settings complement each other. Adjust compression and rebound damping accordingly.

  3. Inspect tyre pressure: Incorrect tyre pressure can significantly affect handling. Verify and adjust to recommended levels.

  4. Examine steering head bearings: Loose bearings can cause instability. Check for play and tighten if needed.

Unexpected Noises

Strange sounds after lowering your bike could indicate:

  1. Loose fasteners: Systematically check and tighten all bolts, paying special attention to suspension components.

  2. Chain slap: A lowered bike might experience increased chain slap. Adjust chain tension and consider using a chain guide.

  3. Suspension bottoming out: If you hear clunking noises, your suspension might be bottoming out. Increase preload or compression damping.

  4. Exhaust contact: Ensure the exhaust isn't contacting the swingarm or other components when the suspension compresses fully.

Rider Discomfort

If you're experiencing discomfort after lowering your bike:

  1. Adjust handlebar position: Lowering often changes riding position. Experiment with handlebar height and angle for better ergonomics.

  2. Check foot peg position: Consider adjusting foot pegs if your legs feel cramped or overstretched.

  3. Reassess seat height: You might need a different seat or modifications to maintain comfort with the new bike height.

  4. Fine-tune suspension: Adjust compression and rebound settings to match your weight and riding style for improved comfort.

Reduced Ground Clearance

If you're frequently bottoming out or hitting obstacles:

  1. Increase preload: This can help maintain some ground clearance without reverting the lowering.

  2. Adjust riding style: Be more mindful of obstacles and adapt your technique for the lower bike.

  3. Consider compromise: You might need to raise the bike slightly to find a balance between lowered height and adequate clearance.

Uneven Tyre Wear

Unusual tyre wear patterns could indicate:

  1. Alignment issues: Check and adjust wheel alignment.

  2. Improper suspension setup: Ensure your suspension is balanced and properly set for your weight and riding style.

  3. Incorrect tyre pressure: Verify and adjust tyre pressure to recommended levels.

Performance Changes

If you notice a decrease in performance:

  1. Reassess gearing: Lowering can affect your bike's power delivery. Consider adjusting your gearing to compensate.

  2. Check for binding: Ensure all moving parts, especially in the suspension, move freely throughout their range of motion.

  3. Verify air filter and exhaust: Make sure these haven't been affected by the lowering process.

Remember, troubleshooting is often an iterative process.

Make one adjustment at a time and test thoroughly before moving on to the next.

If problems persist or you're unsure about any adjustments, don't hesitate to consult a professional mechanic.

They can provide expert diagnosis and ensure your lowered dirt bike is safe and performing optimally.

Conclusion:

Lowering a dirt bike is akin to tailoring a suit – it's all about achieving the perfect fit for optimum comfort and performance.

To succinctly achieve this, start by relieving the fork's pressure and lifting the bike by its engine.

Then, loosen the fork pinch bolts and slide the forks up through the triple clamps to adjust the height.

As you piece everything back together, ensure you tighten all pinch bolts without missing any component.

With these steps, you're primed to ride with both comfort and safety in mind!

Further Learning Resources

Eager to delve deeper? We've got you. Here are some resources that can quench your thirst for dirt bike knowledge:

With these resources, your journey from a novice to a dirt bike maestro will be a smooth ride!

FAQs

Why would someone want to lower a kid's dirt bike in the first place?

Riders often lower their dirt bikes to enhance handling or boost comfort. Notably, adjusting the front end can result in quicker steering response. This modification is particularly beneficial for those wanting a more agile and responsive ride.

Are there any specific tools needed to lower a dirt bike for kids?

Yes, while basic hand tools like wrenches and screwdrivers are commonly used for minor adjustments, some methods, such as installing a lowering link or adjusting the preload on the rear shock, may require more specialized tools or equipment. Always refer to the dirt bike's manual or consult with a professional before starting.

After lowering a dirt bike, will it affect the bike's resale value?

Potentially. Any modifications, including lowering, can impact a dirt bike's resale value. However, if the adjustments are done professionally and can be reversed, the impact might be minimal. Prospective buyers often appreciate a well-maintained bike that caters to riders of different heights, especially if they're buying for younger riders.

Is it recommended to combine multiple methods of lowering for a significant height decrease?

While it's technically possible to combine methods, such as adjusting both the front forks and installing a lowering link, doing so can greatly affect the bike's handling and performance. It's essential to strike a balance and ensure that any changes don't compromise safety. Always test the bike in safe conditions after each adjustment.

Additional Resources

Get in Touch 🚀

Hey there, savvy shopper! Loved what you read? Got the itch to dive into more wheely-awesome info?

Whether you're a brand new parent or a grandparenting pro, we're here for all your kids ride-on toy questions! 🚗💨

Feeling click-happy?

Jump straight into our wonderland at RiiRoo.com. Or, if you're more the chatty type, give our Live Chat a whirl and let's talk toys!

Latest Stories

View all

How to Choose a Kids Ride-on Motorbike: A Parent's Complete Guide

How to Choose a Kids Ride-on Motorbike: A Parent's Complete Guide

Before You Buy: Essential Questions Choosing the right ride-on motorbike for your child can feel overwhelming with so many options available. Before you start shopping, take a moment to consider these crucial questions that will guide your decision-making process. First,...

Read more

Dirt Bike Accessories

Top 10 Essential Dirt Bike Accessories for Beginners: Gear Up for Safety and Fun

Published: 29.8.24 Are you revving up to hit the trails on your dirt bike for the first time? Before you twist that throttle, let's make sure you're geared up for safety and success. In this comprehensive guide, we'll walk you...

Read more

10 Best Mods to Lower Any Motorcycle for Short Riders: A Comprehensive Guide

10 Best Mods to Lower Any Motorcycle for Short Riders: A Comprehensive Guide

Published: 29.8.24 For many motorcycle enthusiasts, the thrill of riding is unmatched. However, if you're a shorter rider, that excitement can be tempered by the challenges of managing a bike that feels too tall or unwieldy. The good news is...

Read more