


Updated: 09.05.25
Got a flat quad bike tyre? Learn how to replace it yourself with this simple 7-step guide!
Changing a quad bike tyre is similar to swapping a dirt bike tyre, but the heavier, larger tyres require extra effort. With the right tools and steps, it’s a rewarding skill that saves time and money.
1. Gather Your Tools
Before starting, collect these essentials: valve stem remover, tyre irons, new tyre, mechanic’s lubricant, air compressor, torque wrench, tyre gauge, wheel chocks, jack or lift, and thick work gloves for safety.
| Tool | Purpose |
|---|---|
| Tyre Irons | Break the bead and remove tyre from rim. |
| Torque Wrench | Tighten lug nuts to correct specification. |
| Valve Stem Tool | Remove and install valve stem. |
| Air Compressor | Inflate new tyre to recommended pressure. |
| Tyre Gauge | Check tyre pressure. |
| Wheel Chocks | Stabilize quad bike during repair. |
| Jack or Lift | Elevate quad bike to remove wheel. |
| Work Gloves | Protect hands during repair. |
Work in a clean, flat area to ensure safety and efficiency. Explore quad bike accessories for quality replacements.
2. Safety First
Safety is critical when changing a quad bike tyre to avoid injury or damage.
Inspect for Hazards
Check the wheel area for sharp edges that could harm you or the new tyre. Ensure your workspace is clear of tripping hazards.
Use Proper Lifting Techniques
Avoid injury by lifting correctly: bend at the knees, keep your back straight, and use leg strength. Use a jack or lift, and ask a friend to stabilize the quad bike if needed.
3. Step-by-Step Tyre Change
Step 1: Drain the Air
Use a valve stem remover to release all air from the tyre. Alternatively, press the valve stem nut to deflate it completely.
Step 2: Break the Seal
Press down on the tyre’s sidewall or flip a tab to break the seal between the tyre and rim. This may require effort, depending on your quad bike model.
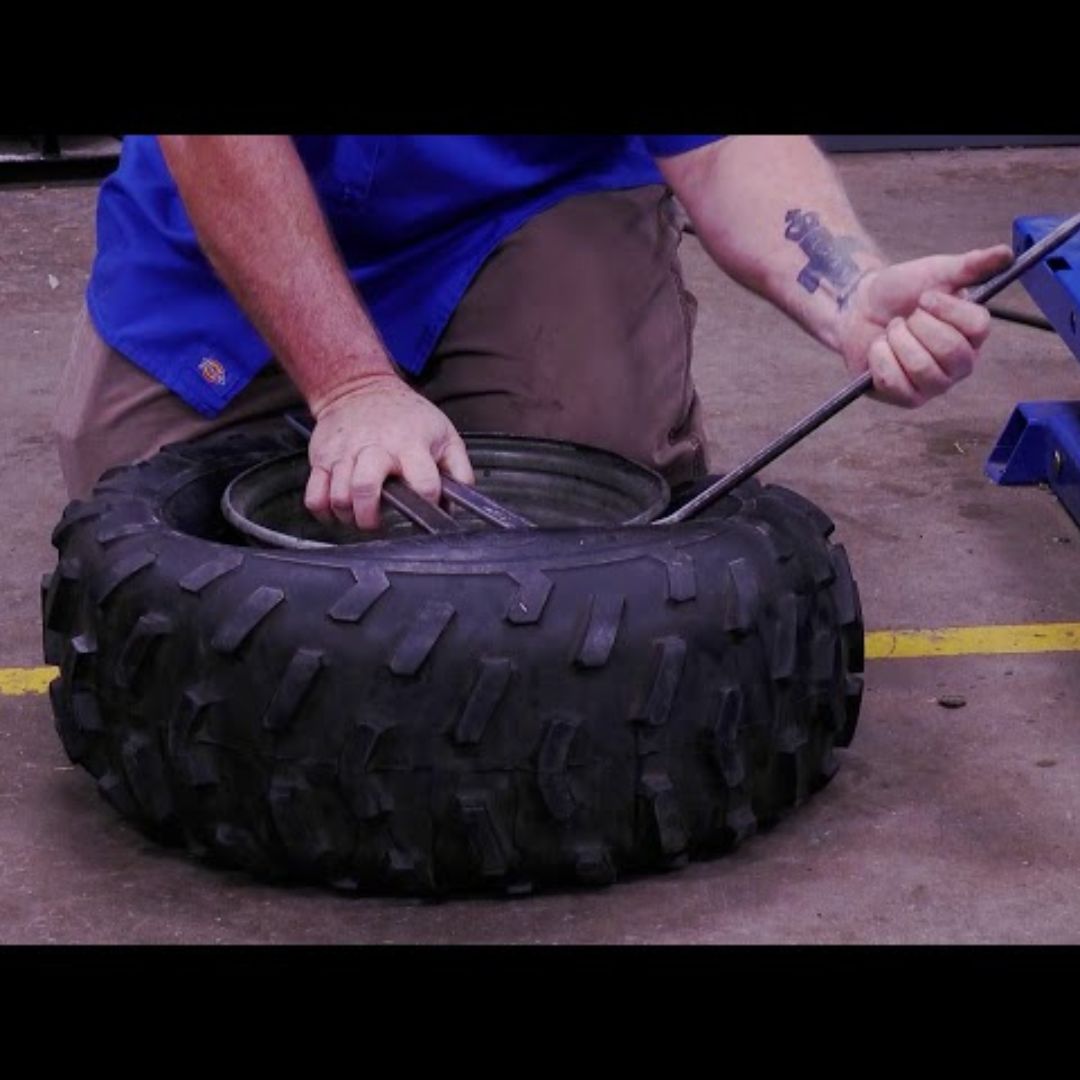
Step 3: Remove the Old Tyre
Wedge tyre irons between the tyre and rim, working around to pry the tyre off. It may take practice, but the tyre will come off with persistence.
Step 4: Install the New Tyre
Place the new tyre on the rim and use tyre irons to lever it into place. Inflate with an air compressor, adjusting to ensure proper seating.
Step 5: Secure the Wheel
Reattach the wheel to the quad bike, tightening lug nuts with a torque wrench to the manufacturer’s specifications.
Step 6: Check Tyre Pressure
Use a tyre gauge to confirm the new tyre is inflated to the recommended pressure, typically found in the owner’s manual.
Step 7: Test and Inspect
Lower the quad bike, remove wheel chocks, and test the tyre by rolling it gently. Inspect for leaks or improper seating.
4. Pro Tips for Success
- Apply a thin layer of lubricant to the rim to ease tyre installation.
- Be patient—tyre seating may require multiple attempts.
- Always inflate to the recommended pressure to ensure safety and performance.
- Wear gloves to protect your hands from sharp rims or tools.
- Recycle the old tyre at a local recycling centre to support sustainability.
5. Tyre Maintenance Tips
Monitor Tyre Pressure
Check tyre pressure regularly, as it can fluctuate with weather or riding conditions. Adjust to the manufacturer’s recommended levels for safety and longevity.
Inspect for Damage
Routinely examine tyres for cracks, punctures, or wear. Early detection prevents breakdowns and extends tyre life.
6. Final Thoughts
Changing a quad bike tyre in just seven steps is a practical skill that saves money and boosts confidence. With proper tools, safety precautions, and maintenance, you’ll keep your quad bike trail-ready.
Ready to ride? Shop our quad bikes or explore more maintenance guides to stay prepared!
Frequently Asked Questions
How often should I change my quad bike tyre?
Replace tyres when they show significant wear, cracks, or punctures, typically every 1–3 years, depending on usage and conditions.
Can I change a quad bike tyre without a jack?
A jack or lift is recommended for safety and ease. Without one, it’s risky and difficult, especially for heavier quad bikes.
What tools do I need to change a quad bike tyre?
You’ll need tyre irons, a valve stem tool, torque wrench, air compressor, tyre gauge, wheel chocks, jack, gloves, and lubricant.
How do I know the correct tyre pressure for my quad bike?
Check the owner’s manual or the tyre sidewall for the manufacturer’s recommended pressure, usually 5–15 PSI for quad bikes.
Where can I recycle my old quad bike tyre?
Take it to a local recycling centre or tyre shop that accepts used tyres for eco-friendly disposal.


Share:
Everything You Need to Know About Quad Bike Tyres
The Advantages and Disadvantages of Quad Bikes